Why Do I Need an External Microphone for Vlogging?

Time:2026-10-08 Author:Henry
0%

When viewers search “why do i need an external microphone for vlogging,” they usually want a practical answer. They want to know whether better sound truly matters. It does. A phone may capture sharp images, but its built-in microphone also records traffic, wind, clothing rustle, and room echo. Those distractions can make a polished vlog feel careless.

Audio educator Curtis Judd puts it plainly: “Audio is more important than video.” His advice reflects real production experience. Viewers may tolerate a soft image or imperfect lighting. They often leave when voices sound distant, harsh, or unclear. An external microphone places the capsule closer to the speaker. A lavalier can sit beneath a shirt collar. A compact shotgun mic can reduce side noise during a street vlog. Small changes can feel surprisingly large.

Still, an external microphone is not a magic solution. Placement matters. Gain settings matter. Wind protection matters. I have seen creators buy expensive equipment, then clip the microphone against fabric. The result was worse, not better. That is an uncomfortable detail, but it deserves attention. A reliable setup should match the filming situation, camera, and budget. Testing ten seconds of audio before recording can prevent an entire unusable take.

This guide explores when an external microphone earns its place in a vlogging kit. It considers sound quality, mobility, compatibility, background noise, and practical recording habits. The goal is not perfect studio audio. It is clear, natural speech that keeps viewers watching.
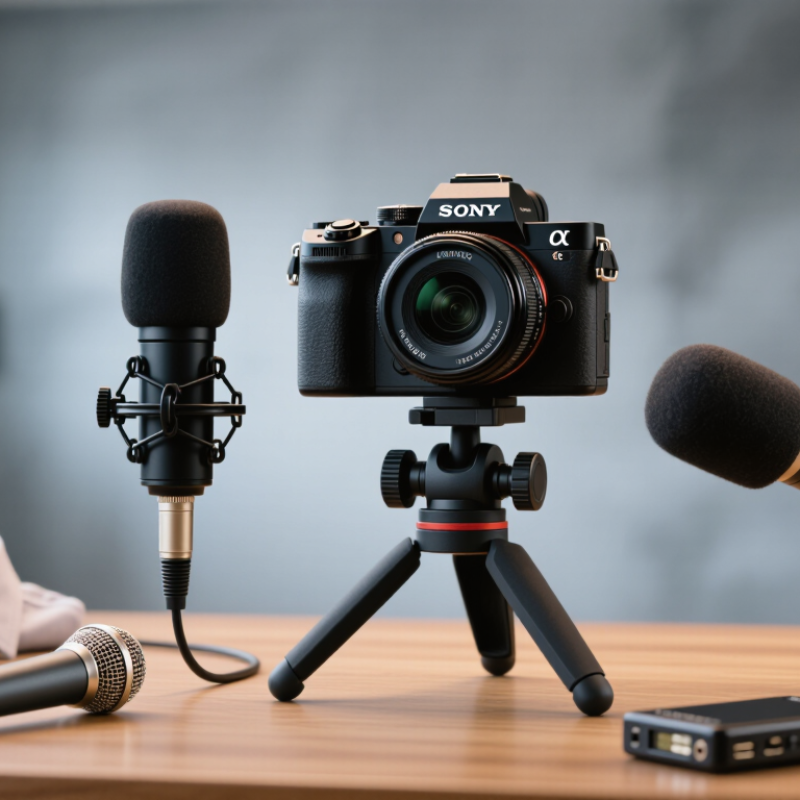
Why Do I Need an External Microphone for Vlogging?

What an External Microphone Adds to Vlogging Audio

Why Do I Need an External Microphone for Vlogging?

What an External Microphone Adds to Vlogging Audio

An external microphone captures clearer speech than most built-in camera microphones. It can sit closer to your mouth, reducing room echo and background noise. That distance matters. A busy street may sound less harsh. Your voice may also feel warmer and more focused. During handheld filming, a suitable microphone can reduce handling sounds and sudden bumps. A windscreen helps protect outdoor recordings from gusts, though it cannot remove every rumble.

Good audio also improves consistency between clips. Viewers can follow your story without constantly adjusting the volume. Many external microphones provide headphone monitoring, which reveals problems before you finish filming. Listen for clothing friction, air conditioners, traffic, or weak connections. These details are easy to miss while recording. A stable mounting position also keeps the sound character more predictable.

An external microphone is not a magic fix. A poor room can still create echoes, and incorrect settings can produce distorted speech. I once focused on sharp video while ignoring a noisy refrigerator nearby. The footage looked usable, but the audio needed heavy editing. That mistake changed my setup routine. I now record a short test, check the levels, and listen with headphones. Sometimes the simplest improvement is moving closer to the speaker. A microphone helps, but careful placement still matters.

How Camera and Phone Microphones Limit Recording Quality

When I vlog, the built-in microphone sits far from my mouth. That distance quietly damages speech clarity. In free-field acoustics, doubling the distance can reduce direct sound by about 6 decibels. Room reflections and traffic noise then become more noticeable. A camera or phone microphone also hears finger touches, clothing friction, and wind before I notice them.

Automatic gain control creates another problem. It raises quiet speech, but it can raise air-conditioning hum too. Sudden laughter may then sound harsh or clipped. The International Telecommunication Union’s ITU-R BS.1770-4 describes loudness measurement using LUFS, helping editors judge perceived volume more consistently. The European Broadcasting Union’s EBU R 128 recommends an integrated loudness target of -23 LUFS for broadcast delivery. These figures do not repair weak recordings. They only reveal how uneven the original audio became.

An external microphone places the capsule closer to the speaker. That improves the direct-to-noise ratio before editing begins. It also gives creators more control over direction, wind protection, and input levels. My own mistake was trusting a quiet room too much. A room can feel silent while its refrigerator hum fills the recording. I sometimes still record without checking headphones. That is careless. A ten-second monitoring test can expose buzzing, rubbing, or a dead channel before an entire vlog is filmed.

Why Do I Need an External Microphone for Vlogging? - How Camera and Phone Microphones Limit Recording Quality

Recording Factor Built-In Camera Microphone Built-In Phone Microphone External Microphone
Microphone Position Usually mounted on the camera body, often 0.5–2 m from the speaker. Usually located close to the phone frame, but commonly still far from the speaker during handheld filming. Can be positioned close to the speaker, such as 10–20 cm for a lavalier microphone or 30–100 cm for a directional microphone.
Speech Clarity Voice level decreases quickly as the camera moves farther away, allowing more room sound into the recording. Digital processing can improve intelligibility, but distant speech may still sound thin, echoey, or inconsistent. Closer placement produces a stronger voice signal and usually improves clarity without requiring excessive software amplification.
Pickup Pattern Often uses a compact omnidirectional or mildly directional microphone with limited front-to-back separation. May combine several small microphones for basic direction selection and noise reduction. Available patterns include omnidirectional, cardioid, supercardioid, and shotgun designs for different recording positions.
Background Noise Captures traffic, air-conditioning, room reflections, and nearby conversations when the subject is distant. Noise-reduction algorithms can reduce steady sounds but may create pumping, warbling, or artificial-sounding speech. Closer placement and directional options can reduce the relative level of background noise before processing is applied.
Wind Protection Small built-in openings provide limited protection against wind and handling turbulence. Wind can overload the small microphone ports, especially during outdoor filming. Foam windscreens, furry windshields, and shock mounts are widely available for outdoor recording.
Handling Noise Camera grip, lens movement, buttons, and tripod adjustments may be transmitted through the camera body. Hand contact, case movement, and rubbing against clothing can be recorded clearly. A cable, shock mount, or body-worn clip can isolate the microphone from camera and hand movement.
Frequency Response Designed primarily for compactness and general-purpose speech, with limited low-frequency extension in many models. Usually optimized for voice capture and computational enhancement rather than natural full-range recording. Different models can be selected for natural speech, reduced rumble, enhanced presence, or broader frequency response.
Maximum Recording Level Loud sources may cause clipping when the input gain is automatic or difficult to control. Automatic gain control may raise quiet sounds and reduce loud sounds, sometimes producing audible level changes. Many external systems provide adjustable gain, selectable input levels, or built-in attenuation for louder sources.
Monitoring During Recording Headphone monitoring may be unavailable or dependent on the camera’s ports and settings. Headphone monitoring can be limited while recording, particularly when the device uses one multifunction connector. Many external recorders and wireless receivers provide a dedicated headphone output for checking sound in real time.
Connection Options Usually connected internally, leaving limited flexibility for microphone placement. May use a digital or analog accessory connection, depending on the device and adapter. Common options include 3.5 mm TRS, 3.5 mm TRRS, USB, and professional balanced connectors.
Sample Rate and Bit Depth Common video settings include 48 kHz, with 16-bit or 24-bit recording depending on the equipment. Video audio commonly uses 44.1 kHz or 48 kHz, with the actual bit depth determined by the device and application. Many dedicated systems support 48 kHz and 24-bit recording, providing more headroom for editing and level adjustment.
Best Use Case Quick filming, reference audio, casual clips, and situations where convenience matters most. Mobile vlogging, spontaneous updates, travel clips, and recordings where portability is the priority. Interviews, tutorials, outdoor vlogs, demonstrations, narrative videos, and any production where speech quality is important.
Main Trade-Off Fast and convenient, but voice quality is strongly affected by distance, room acoustics, and wind. Very portable and computationally enhanced, but small microphone size and limited placement can restrict natural sound quality. Offers better placement and control, but adds setup time, accessories, power requirements, and additional cost.

Note: Specifications and performance vary by device, microphone design, recording application, room acoustics, and placement. The ranges shown represent common practical configurations rather than universal limits.

Choosing the Right External Microphone for Your Vlogging Style

Why Do I Need an External Microphone for Vlogging?

Choosing the Right External Microphone for Your Vlogging Style

Your microphone should match how you vlog. A compact directional microphone suits walking videos, street interviews, and travel diaries. It focuses on sound in front of the camera and reduces nearby distractions. A small wireless microphone works better for talking while moving. It keeps your voice clear when the camera is several steps away. I have found that distance ruins audio faster than slightly imperfect video.

For quiet home videos, a desktop condenser microphone can create a warmer, more detailed voice. Place it about 15 centimeters from your mouth. Use a pop filter if strong “p” sounds become distracting. Outdoor creators need wind protection, even on calm days. A furry cover can reduce the soft rumble caused by passing air. Test it before filming.

Your camera, phone, and recording habits also matter. Check whether the microphone needs a cable, adapter, battery, or separate receiver. I once chose a microphone for its small size and ignored handling noise. That mistake made every camera movement sound heavy. Now I record ten seconds of room tone before each session. It helps me notice buzzing, echo, and sudden volume changes. Still, I sometimes overcorrect and make voices sound too quiet. Listening with headphones remains essential, especially near traffic, water, or crowded cafés. A microphone is not automatically better because it costs more.

Connecting and Positioning a Microphone for Clearer Sound

Why Do I Need an External Microphone for Vlogging?

Connecting and positioning an external microphone can make your vlog sound clearer, warmer, and more professional. Your camera’s built-in microphone often sits far from your mouth. It also captures handling noise, room echo, and nearby traffic. Connect the microphone firmly, then check whether your camera recognizes the correct audio input. Wear headphones during a short test recording. I once ignored this step and discovered silent footage later.

Position the microphone about 10 to 15 centimeters from your mouth. Aim it toward your voice, but keep it outside the frame when possible. A small windscreen helps reduce breath noise and outdoor wind. Keep the cable away from zippers, loose jewelry, and camera straps. These objects can create sharp rubbing sounds. Small changes matter. Avoid placing the microphone directly under your chin, where clothing may block sound. If your device offers manual gain, lower it until normal speech peaks clearly without distortion. Leave some headroom for louder words.

Tips: Record ten seconds before filming. Listen for echo, buzzing, and uneven volume. Move closer before raising the gain. In a quiet room, face curtains, rugs, or bookcases to reduce reflections. Outdoors, turn your body away from strong wind and protect the microphone carefully. A test may feel unnecessary, but my own rushed recordings have proved otherwise. There is no perfect position for every room, so adjust, listen, and question what sounds “good enough.”

Improving Voice Quality Through Simple Recording Techniques

Why Do I Need an External Microphone for Vlogging?

Improving Voice Quality Through Simple Recording Techniques

An external microphone captures speech more clearly than a camera’s built-in microphone. It reduces distant, hollow sound. Your voice feels closer and easier to follow. During my own indoor recordings, I noticed air conditioners became surprisingly distracting. Moving the microphone nearer helped more than increasing the volume later.

Placement matters. Keep the microphone about 15 to 20 centimeters from your mouth. Aim it slightly toward your chest, not directly at your lips. This reduces harsh breathing sounds and sudden bursts of air. Record a short test before filming. Listen with headphones, because phone speakers can hide background noise. Small adjustments often produce a cleaner result.

The recording space matters too. Bare walls create sharp echoes. Curtains, bookshelves, and soft furniture can absorb some reflections. Outdoors, stand away from roads and hard building surfaces. A basic wind cover can protect speech from light wind, but it cannot fix every problem. I sometimes focus too much on equipment and forget my speaking pace. Slowing down helps, although my delivery can still sound uneven. Leave a little space between sentences. That pause makes editing easier and gives viewers time to understand each idea.

Why Do I Need an External Microphone for Vlogging?

Improving voice quality through simple recording techniques

In a free-field acoustic model, sound pressure decreases by approximately 6 dB each time the distance from the sound source doubles. Placing an external microphone closer to the speaker therefore captures a stronger voice signal, helping the voice remain clearer over room noise, wind, and camera-handling sounds.

FAQS

Why does a camera or phone microphone often record unclear speech?

The built-in microphone may sit far from your mouth. Distance weakens direct speech and increases room noise. Your voice can sound hollow.

How close should an external microphone be?

Keep it about 10 to 20 centimeters from your mouth. Aim it toward your voice, but keep it outside the frame. Closer usually works better.

Where should I position the microphone indoors?

Avoid placing it directly under your chin. Clothing may block or rub against it. Face curtains, rugs, or bookshelves to reduce reflections.

How can I reduce wind and breathing noise?

Use a small windscreen outdoors. Aim the microphone slightly away from your lips. Turn your body away from strong wind. Protection has limits.

What should I check before filming?

Record a ten-second test. Wear headphones and listen for buzzing, rubbing, echo, and uneven volume. Confirm the correct audio input. Do not trust silence.

Why can automatic volume control make recordings worse?

It may raise quiet speech and air-conditioning hum together. Loud laughter can become harsh or clipped. Manual gain gives you more control.

How should I prevent handling noise?

Keep the cable away from zippers, jewelry, and camera straps. Hold the camera gently. Finger touches can sound surprisingly loud.

Can editing repair a weak recording?

Editing can adjust loudness, but it cannot fully restore distant speech. Loudness measurements help reveal uneven volume. They do not fix poor source audio.

Should I focus only on microphone equipment?

No. Speaking pace also affects clarity. Leave short pauses between sentences. I sometimes blame equipment too quickly. My delivery still needs work.

Conclusion

If you are wondering, “why do i need an external microphone for vlogging,” the answer is simple: clear audio makes your videos easier to understand and more enjoyable to watch. Built-in camera and phone microphones often capture distant voices, handling noise, wind, room echo, and surrounding distractions. An external microphone can bring your voice forward, reduce unwanted sound, and create a more polished listening experience. It also gives you greater flexibility when recording interviews, outdoor scenes, tutorials, or moving shots.

The best microphone depends on your vlogging style, location, and recording distance. A compact option may suit casual walking videos, while a directional microphone can focus more closely on your voice. Connect it securely, check that your device recognizes the input, and position it near your mouth without blocking the frame. You can further improve quality by recording in quieter spaces, speaking clearly, maintaining a steady distance, monitoring sound levels, and testing a short clip before filming. Together, the right equipment and simple techniques can make your vlog sound professional and consistent.

Henry

Henry

Henry is a dedicated marketing professional with a profound expertise in the company's offerings. With years of experience in the industry, he possesses an impressive understanding of the market dynamics and consumer behaviors that drive success. Henry is committed to sharing his insights through......